In this section, I going to show you how to make htc u11 wifi hotspot setup easily. After following this method, you can setup the wifi hotspot systems on your htc android smartphone successfully. I also recommended you to read the whole article as mindfulness as a result, you can understand what you have to do for troubleshooting and how you can get wireless wifi hotspot access of your htc android smartphone.
Therefore, this htc u11 is an updated android smartphone for May 2017 even in this month one another smartphone would be published. However, are you know that what’s kind of problems occurred for setup wireless wifi hotspot systems? So lets me show the ways.
HTC U11 WiFi Hotspot Setup
Sometimes, users don’t know about the signal of their wireless systems. This is most important aspects for them. Although, nowadays, without a good signal any android smartphone wouldn’t be published. There has a common signal of HTC U11 is 802.11 a/b/g/n or 802.11 b/g/n etc. You have to make a wireless hotspot connection with the best strongest password otherwise, you cannot get access to user wifi hotspot of other android smartphone devices.
Setup WiFi Hotspot on htc U11
- Tap on Apps and to the Setting option
- Now tap on the More option

- View Wireless & Network option from more option
- Now view the Mobile network sharing option
- Now, press Setup WiFi hotspot of HTC U11
- Put the Router name or Network name on the SSID field
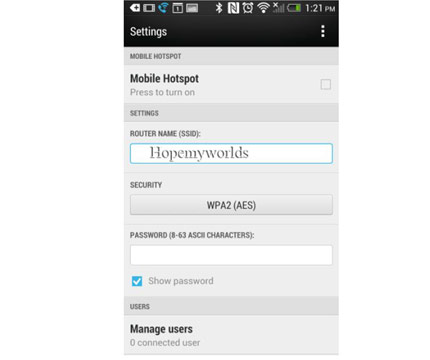
- Select Security WPA2 (AES)(Required for password)
- If select None security (Required for none password)
- Save the wifi hotspot setting
On your WiFi hotspot program and establish the Connection
- Take another device that you want to connect with HTC U11
- From this device, turn on WiFi
- Now, Find the available network from the wifi fields
- This is available wifi network that you had been put on SSID field
- After finding, select and connect the wifi
- If WPA2 PSK creation, then type password otherwise, none
- After created the connection successfully, you would be able to use wireless internet or wireless Wi-Fi easily.
For various reason, you may not establish the network properly. If you have been failed repeatedly then follow these option and I hope, you will success to establish the network successfully.