This blog shares with you an easy guide that has the necessary tools and steps to successfully rebuild the hydraulic cylinder. By referring to the blog, you can rebuild the cylinder seamlessly.
Whether you are an industry owner or a farmer, you are likely to use equipment that involves hydraulic cylinders. Modern tractors like backhoes and front end loaders use hydraulic cylinders for power steering and lifting systems. Also, many combine and cultivation equipment use hydraulic systems. The use of equipment over a long period can lead to a leaky cylinder. Then, hydraulic cylinder repair and rebuild will become necessary.
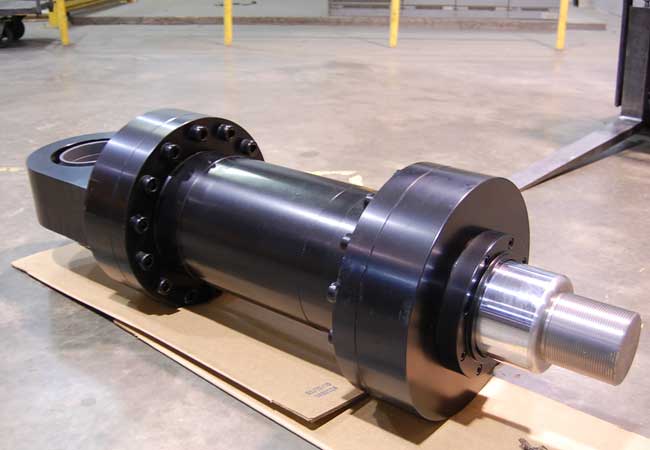
The DIY Approach to Rebuilding a Hydraulic Cylinder
If you have a leaky cylinder, then you will need to replace it at the earliest to maintain the efficiency of the equipment. Common causes for leaky cylinder can be leaky seals, scratches or pits on the bore of a cylinder or a bent piston. Rebuilding your cylinders follows with – disassembling, inspecting, repacking seals, and reassembling. You can hire a professional service to repair and rebuild hydraulic cylinders.
However, this blog focuses on rebuilding the hydraulic cylinder on your own. If you are mechanically sound, then you can directly buy a seal kit and repair yourself. Below is the step-by-step guide for rebuilding the hydraulic cylinder.
Preparation:
Before you begin with disassembling, you should know that there are numerous types of hydraulic cylinders, each designed for a different purpose. Hence, you need to ensure that you buy the right repair or rebuild kit, which is fit for your hydraulic cylinder repair. You can locate the part number on the end cap or the exterior of the cylinder.
You can order a seal kit from the internet with the same part number as given on your hydraulic cylinder. It would be best if you also considered getting a printout of the parts diagram as it will when you start reassembling the cylinder.
Also, note that each cylinder has a unique gland and a seal kit. The glands generally have four holes, which you can unscrew from the cylinder. If you don’t have the right wrenches for each gland, then you can DIY the wrench. You can also purchase gland removal tools from the internet.
Disassembling the hydraulic cylinder:
1 – The first thing you should do is to release all the pressure in the cylinder. You can do so by loosening up the hydraulic lines on each end of the cylinder. You can still be able to unscrew the gland without having to remove the end of the cylinder assembly from its end connection.
2 – You can pull the pin from the piston rod end to make some room. And finally, unscrew the gland from the hydraulic cylinder using a tool. If the gland is not coming out, then tapping slightly or few light bumps with a hammer can loosen the gland. When the gland gets loose, it will unscrew easily and pull away from the cylinder if there is some room.
3 – After the gland gets removed, pull out the piston rod from the cylinder. If a cylinder is large, then it may need support to keep it straight while detaching from the piston rod. Keep the piston rod away from dust and even falling against other metal components. You have to safeguard all the parts like fine threads inside the cylinder.
4 – Put the rod end back into the pin connection after the piston rod gets free. You will need to unscrew the retaining bolt that is holding the piston to the rod. Be careful throughout the process and protect yourself as well as the expensive equipment.
Reassembling the hydraulic cylinder:
1 – Most rebuild kit will have instructions that will help you perform the right process of hydraulic cylinder repair. Be thorough with instructions before O-rings and seals in the glands and piston. Some seals are thin, and if you don’t install them evenly, then it may cause damage.
2 – Assess each O-ring with each groove; then remove it and install one at a time. It will keep you away from getting confused about the correct placement of O-ring. It would help if you also cleaned each groove and seal before replacing it with a new part.
3 – While reassembling the piston to the rod, you need to reverse the process. You have to use a thread locking adhesive in the process. When you have oiled all the parts, then tap the piston back into the cylinder. Finally, replace the hydraulic lines and run a check for leaks around new seals.
In a nutshell
Rebuilding a hydraulic cylinder is not as complicated as you think. It involves a few simple steps – disassemble, figure out the problem, replace or repack the seals, and finally, assemble it back again. All you need is a seal kit and the right tools to perform the task. When you do the hydraulic cylinder repair by yourself, it will not only save you money but also give you a great satisfaction of completing the job all on your own.