It’s the end of a long, frustrating day of work and on top of that, it’s raining. As you pull into the driveway, you hit the garage door opener, and nothing happens!
As you dry off from the rain, you start looking for a garage door replacement. The average garage door costs over $1000 to replace!
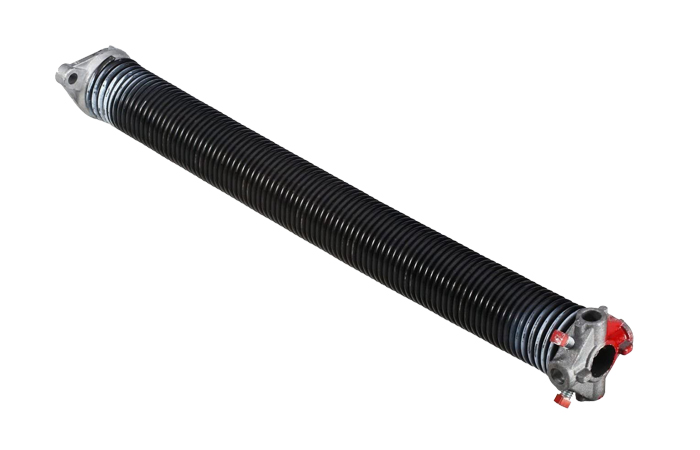
Garage Door Torsion Spring

You might not need to drop that much money on a full replacement. Sometimes, all you need is new torsion springs. Before you decide to scrap your whole door, keep reading to learn all about replacing a garage door torsion spring.
When Does the Torsion Spring Need Replacement?
Before taking a sledgehammer to the door, take a look and see if you can diagnose the problem. If your door feels too heavy or too light the springs may need attention.
On average you can get about four to nine years of regular use out of torsion springs. Replacing the springs doubles the life of your garage door, so it’s worth keeping up on your springs.
Recommended Articles
- How to Open Combination Safes
- How to Adjust Door Closer?
- How to Adjust a Self-Closing Door Mechanism
Preparations and Safety Measures
Fair warning, replacing these giant springs can cause serious injury if you aren’t careful! It’s important to do everything you can to ensure your safety during this project.
Some safety tips before you begin are to stand on a sturdy level ladder (with someone at the base of the ladder when possible. Also, ditch the loose clothing, but do wear your safety glasses. Make sure to keep your clothes and body parts away from the springs at all times!
One more tip, before you begin, make sure to unplug the garage door opener. You don’t want that to start up on accident while you’re working on the door.
Locate All the Tools You Need Before You Begin
You don’t want to find that you forgot to grab a tool while you’re in the middle of the replacement. Make sure you have these tools nearby because you’ll use them all at some point.
- Two torsion springs
- At least one 10″ vise grips (two if you have them)
- Adjustable wrench
- Two 1/2″ X 18″ winding bars
- Ladder
- Shop rag you don’t mind getting oil on
- Measuring tape
- (Optional) socket wrench and sockets
Measuring the Replacement Tension Springs
Before you buy the replacement tension springs, you’ll want to make sure to measure the old ones so you know what size to buy. When you measure, make sure not to touch the winding cone at all at this point.
You’ll need several measurements to make sure you get the right replacements. Jot down the measurements for the length, diameter of the inside of the spring, and the length of twenty coils (this determines the gauge of the wire).
If you have any questions about getting the right measurements, ask a professional to help you pick your garage door torsion springs.
How To Replace a Garage Door Torsion Spring Yourself
Many homeowners decide to save the extra money and replace the tension springs themselves. If you want to DIY this repair, these are the steps you’ll take to do it.
Mark the Shaft
The first step is to mark the shaft at the end of the tension spring using a file or a marker. Try not to touch the cable drum and don’t grasp the shaft or you could break the spring. If both springs have already come unwound, wrap the spring back around the shaft and then measure.
Unwind and Remove Old Springs
Now comes the most dangerous step, removing the old springs. Make sure to never touch a set screw without a winding bar fitted into the winding cone! Take your time so you don’t break the old springs.
Installing New Torsion Springs
After removing the old springs, it’s time to install the new ones. You’re going to do everything you did to remove the old ones but in the opposite order. Be careful because brand new tension springs can also break during the installation process.
Winding the New Torsion Springs
With the winding bar inserted into the cone, start making small adjustments little by little. Continue winding the spring until you see the mark on the shaft that you placed earlier. Lubrication and Check Moving Parts of the Garage Door. Ok, the springs are set. It’s time to do the final checks and lubrication.
Make sure to check the garage door balance. If you used the right-sized springs, the door should stay down when closed. Make adjustments until the door sits level. Reconnect the Automatic Garage Door Opener
To finish up the job, plug the automatic garage door opener back into the electrical socket. Then, do a couple of test runs and watch for any issues.
Your Home Is Your Castle, Make It a Comfortable One
If the door itself isn’t broken and the panels aren’t falling apart, you don’t need to replace the whole thing. You’ll spend way more money than you need to.
When the problem is so easy to fix, replacing a couple of torsion springs is a no-brainer! If you feel uneasy about doing the job by yourself, consider hiring someone to do the job for you. It’ll still end up cheaper than a full garage door replacement.
We hope you enjoyed reading this article and that you learned all about replacing a garage door torsion spring. If you’re looking for more great articles about lifestyles, how-tos, reviews, and more, check out the rest of our blog today!